Customer Portal
Latest Version
OffiSign-In v1.58.2
Released: 2/6/2024
| Download | See Changes |
OffiSign-In Remote v1.58.2
Released: 2/6/2024
| Download | See Changes |
Electronic Sign-In
Software
OffiSign-In™ software captures and saves a patient's signature as they sign into your office. It was designed to replace the old 'sign-in sheets' and to provide patient confidentiality.
Designed for ease of use. We combine standard electronic signature pads with our easy-to-use software to obtain patient information in a confidential and private manner, eliminating paper-based sign-in sheets. It also reduces paperwork, increases privacy and reduces costs in any environment that requires signatures.
Designed for the PC environment and using standard Microsoft supported operating systems. Our software uses Topaz's Signature Pads, similar to the payment process used in many retail stores today. The signatures are immediately date- and time-stamped for permanent electronic storage and retrevial.


OffiSign-In (OSI) is designed to work with Eclipse™ databases. While accessing and reading these databases OSI does not alter them in any way.
Features
- Automatic Time and Date Stamping
- Marks your patient "Arrived" in the Eclipse™ Appointment Scheduler
- If an Appointment doesn't exist then OSI will add one to the Appointment Scheduler and mark it as arrived
- When you close the program it automatically creates a backup PDF file of the days entries
- Search and Print by Office, Doctor, or for an individual patient by date range
- Remote Viewer, see who has signed-in and in what order from any computer in the office
- Designed in conjunction with a chiropractor with 30+ years of experience
- Designed and Maintained by professional programmers
Additional PRO Features
- Sign-Out capability
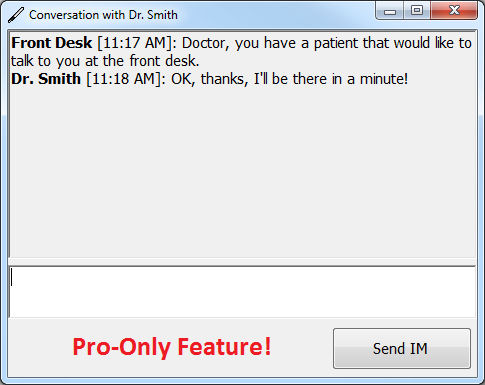
- Instant Message with all Remote Viewers
- Additional features to be added
There are multiple ways to use OffiSign-In™
Front Desk Sign-in
- When the patient enters they sign the Tablet and take a seat.
- OSI interface will pop up on the front-desk computer.
- The staff types in the patients name in the 'Patient Search' area until the correct patient's name appears.
- They double clicks on the patients name and the signature is time stamped, attached to that patient's database within OSI and saved.
- The patients name will then appear on the 'Today's Patients' list with the time they signed in.
- In Eclipse™ OSI will look for a scheduled appointment for that patient on that day; if one is present OSI will mark it as arrived. If one isn't found OSI will then make an appointment for that patient in Eclipse™ at the time they signed in and mark it as arrived.
Self Sign-In In order for this feature to work each patient must have a Home Phone Number assigned in Eclipse™
- When the patient enters they sign the Tablet
- There is an OK button at the top of the Tablet that they touch
- They are then asked for the last 4 numbers of their home phone number, they push OK
- If they are the only person with that phone number the patients name and the signature is time stamped, attached to that patient's database within OSI and saved.
- If more then one person has those digits a number of birthdates appear and the patient is asked to click on their birthday and they are entered into the system.
- In Eclipse™ OSI will look for a scheduled appointment for that patient on that day; if one is present OSI will mark it as arrived. If one isn't found OSI will then make an appointment for that patient in Eclipse™ at the time they signed in and mark it as arrived.
Patient Self Queue
- When the patient enters they sign the Tablet
- There is an OK button at the top of the Tablet that they touch
- Their signature is time stamped and entered into OSI's Queue (OSI's waiting area)
- The office can then assign the signature to the correct patient at their leisure by clicking on the 'View Queue' button or on the Process Button next to the Queued Signature
Auto Queue
- When the patient enters they sign the Tablet
- If nothing is done with the signature in 20 seconds OSI automatically Queues it
- Their signature is time stamped and entered into OSI's Queue (OSI's waiting area)
- The office can then assign the signature to the correct patient at their leisure by clicking on the 'View Queue' button or on the Process Button next to the Queued Signature
Pro Feature Details
Front Desk Sign-out (after signing in as described above for the Front Desk Sign-In)
- As the patient completes their treatment the front desk would then click on the 'Out' button next to the patients name on the 'Today's Patients' list.
- This will record the time the patient leaves the office and calculate the time from sign-in to sign-out and record it with the signature information.
Remote Viewer Pro
- The OffiSign-In™ Pro Version adds instant message capabilities between computers through out the office.
Click on images to enlarge
|
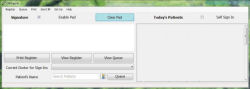
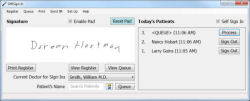
Main Screen ViewThis is what you will see when OffiSign-In™ opens. |
|
With SignaturesAs the patient signs in their signature will appear in the OffiSign-In™ program. |
|
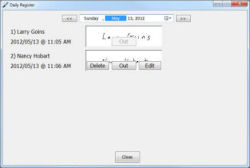
Electronic Register ViewYou can view the captured signatures with the option to Check the patient out (Pro Version) edit (to correct miss labeled signatures) or delete them from this screen. |
|
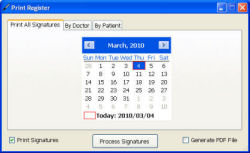
The Print Options MenuPrint signatures by patient name, office, day or treating physician. |
|
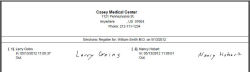
Sample PDFWhen you close OffiSign-In™ it automatically creates and stores a pdf of the day's signatures as a back-up. |
Topaz Signature Gem 4x5 LCD |
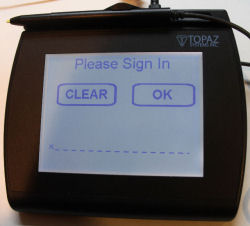
Initial Topaz ScreenThe patient will see this screen when they enter the office. |
Topaz Signature Gem 4x5 LCD |
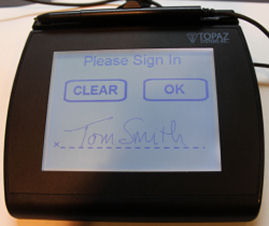
Topaz Pad With SignatureAfter signing the device the patient selects OK to enter their signature. |
Topaz Signature Gem 4x5 LCD |
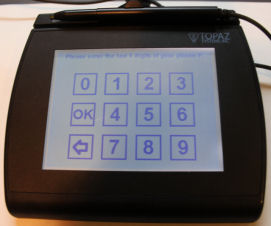
Phone Number PromptIn Self Sign-In mode the patient will then be prompted to enter the last 4 digits of their home phone number.In order for this feature to work each patient must have a Home Phone Number assigned in Eclipse™ |
Topaz Signature Gem 4x5 LCD |
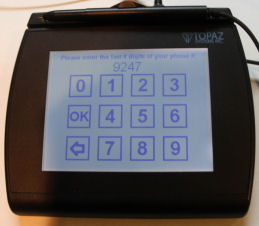
Phone Number EnteredOnce they enter the last 4 digits of their home phone number they will choose OK.In order for this feature to work each patient must have a Home Phone Number assigned in Eclipse™ |
Topaz Signature Gem 4x5 LCD |
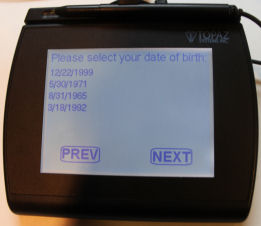
Multiple Patients with the Same Phone NumberIf more then one patient has the same phone number they will be asked to choose their date of birth.After selecting their birthdate they will be entered into the OffiSign-In™ database and checked as arrived in the Eclipse™ apointment scheduler. In order for this feature to work each patient must have a Home Phone Number assigned in Eclipse™ |
Hardware
Windows XP, Windows Vista, Win 7, Win 8.1, and Win 10
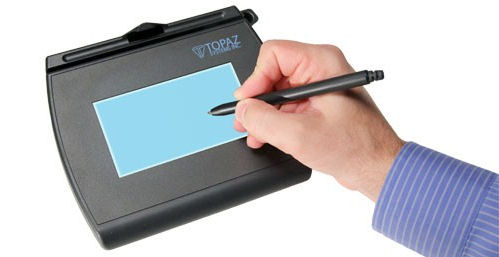
Topaz pads are available in Seriel and USB. We recommend the USB version.
OffiSign-In™ Software works with Topaz Signature Gem Capture Devices: SignatureGem LCD Displays include high-quality electronic signature capture features of Topaz signature pads with the added feature of an LCD interactive display allowing users to see "electronic ink" under the pen tip as they sign as well as navigate and display text and graphics. This includes a more rugged digitizing pen and inert tempered glass surface.
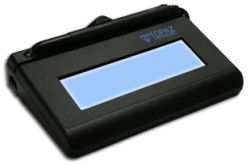 |
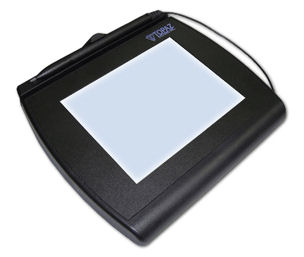
Topaz Signature Gem 1x5 LCD Model: T-L462 non backlit (With a 1" by 5" signature capture area.) Or model T-LBK462 for a back lit screen |
 |
Topaz Signature Gem 4x5 LCD Model: T-LBK766 (backlit screen) (With a 4" by 5" signature capture area.) If you plan on using the Self sign-in feature we highly recommend getting Model T-LBK766! |
Remote Viewer
The Remote Viewer is free and can be installed on any computer that is attached to the network. It allows the user to see who has signed in at what time and in which order. It can be set up to view who has signed in by the entire office or by a specific doctor.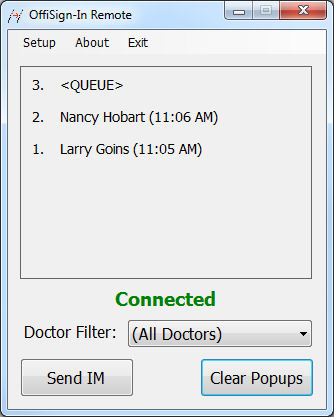
With the Remote Viewer you have 3 options to see who has signed in:
- You can leave the Remote Viewer open on your desktop.
- You can minimize the Remote Viewer and have it set to show Pop-up Notifications
- you can minimize the Remote Viewer and have it set to show Tray Icon Ballons
Remote Viewer Pop-up Notification
When a signature is entered and the Remote Viewer is set for this option a 'Popup" appears on the desktop. These will not close until the user 'Dismisses" them.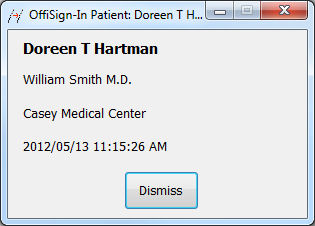
Remote Viewer Tray Icon Notification
When a signature is entered and the Remote Viewer is set for this option a 'Tray Icon Ballon" appears on the lower right corner of the desktop. They disappear in a few moments.Remote Viewer Instant Messaging Capability
This is only available withthe Pro version.